Distilled water is pretty cheap to buy, but it comes in plastic bottles. I’m trying to avoid plastic as much as possible (see use10percentless.com) so I scoured around for simple ways to make distilled water at home, using just things already available at home. In this case, I’m using the distilled water as a base for car windscreen washer fluid which also usually comes in plastic bottles (and with a bunch of chemicals). So I’m avoiding two sets of plastic bottles.
Here’s how I make distilled water at home.
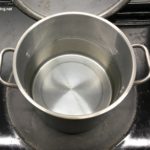
Step 1 – Get a large pot and part fill it with water
 To make distilled water, there’s no getting around boiling water. Here’s a photo of the large pot that I use filled with water up to about two-thirds or three-quarters with simple tap water.
Be prepared now. We’re going to be boiling a large pot of water so take every precaution you can think of. We don’t want any burn victims as part of all this.
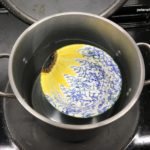
Step 2 – Find a suitable bowl to float in the water
 Now we need to float a bowl in the water. In this case I’m using a ceramic bowl which does the job nicely. It’s just a breakfast bowl really. It must have a good size and weight so that it floats easily and it needs to have a diameter that’s more than half of the diameter of the main pot. The bowl can’t be too big so that it’s awkward to get in and out of the pot.
This bowl is going to be collecting the distilled water, as will be explained below.
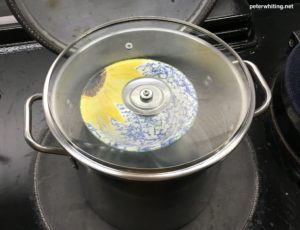
Step 3 – Find an oversized lid that peaks in the middle
 This is the key step to making this whole thing work. We need a lid that is probably not the lid for the pot you’re using to boil the water. It probably needs to be the lid for a larger pot or pan as we’re going to turn it upside down and place it on the pot. I’ll explain why in a moment. In the picture here, I’ve inverted a large glass lid (from a large pan) and put it on the pot that contains the water and the bowl.
So why this large lid and why upside down? Well, as we boil the water, steam will rise and hit this lid. We don’t want the steam to escape, we want it to hit this lid and condense. Then, because the lid is upside down, the condensed water will run downwards, towards the centre, and then drip into the bowl. To make the process go faster, you can put some ice in the inverted lid and this will keep it cold and make the steam condense faster.
Now you also know why the bowl needed to be at least half the diameter of the pot. The point where the inverted lid will be dripping into the bowl will be in the centre of the pot, and the bowl has to be big enough that it will always be dripping into it, no matter where it floats off to.
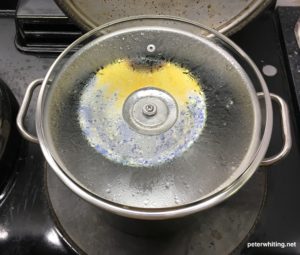
Step 4 – Keep boiling and collect the distilled water
 The water (condensed steam) that drips into the bowl is the distilled water. The heavy metals and impurities in the water do not rise up in the steam, it’s only the pure water that does that.
The aim is to keep the water in the bowl simmering and creating steam. If you let the water boil too vigorously, you run the risk of destabilising the bowl (due to big bubbles) and the bowl might actually sink. So just keep simmering the water and when the bowl has enough water in it, you’ll need to transfer that to a jug, or similar.
Now be extra careful. There’s a lot of boiling water here. When I harvest the distilled water, I carefully lift the pot off the heat source and put it in a stable, safe place. Then I take off the lid off and put it to the side, and then use some tongs (with rubber-like, grippy ends) to lift out the bowl and tip the water into a jug. Then put the bowl back, replace the lid and put the pot back on the heat source to start simmering again.
That’s all there is to it. Just keep going until you have enough distilled water. It’s fairly easy but does take some organising and effort. I feel good about it because I’ve been able to make distilled water with just some utensils we have at home and I’ve avoided buying it in plastic bottles that will most probably just be discarded.
Leave a Reply